
How to Connect Streaming Devices to a Wall Mounted TV: Apple TV, Fire TV, Roku, DIRECTV, Xfinity and Spectrum

Updated: Aug 23
Learn how to install and set up streaming devices, cable boxes, satellite receivers, and soundbars with a wall-mounted TV while keeping cables organized and equipment easy to use.
Streaming Device Installation for Wall Mounted TVs
A wall mounted television looks best when every connected device works reliably and the cables remain out of sight. The physical installation is only one part of the project. Each streaming player, receiver, cable box, gaming console, and soundbar must also be connected to the correct input, powered properly, and configured for the television and network.
Whether you use Apple TV, Amazon Fire TV, Roku, Spectrum, DIRECTV, Xfinity, a soundbar, or a gaming console, careful planning can improve picture quality, reduce connection problems, and make the system easier to control.
This guide explains the basic setup process for popular entertainment devices and the best ways to organize them around a wall mounted TV.
Before Connecting Your Devices
A few minutes of preparation can prevent unnecessary troubleshooting later.
Turn off the equipment: Power down the television and connected devices before changing cables.
Choose the correct HDMI cable: A certified Premium High Speed HDMI cable is suitable for many 4K/60 Hz and HDR installations. Use a certified Ultra High Speed HDMI cable when the system requires features such as 4K/120 Hz, higher bandwidth, or advanced gaming capabilities.
Connect directly during initial testing: Connecting each source directly to the TV can make setup and troubleshooting easier. After confirming that it works, you can route it through a compatible soundbar or AV receiver if desired.
Plan your HDMI inputs: Record which device uses each port, such as HDMI 1 for the cable box, HDMI 2 for Apple TV, and HDMI eARC for the soundbar.
Keep account information nearby: Have your Wi-Fi name, password, and provider login details ready.
Allow updates to finish: New devices may need time to download software, update channel guides, and restart during activation.
Check remote technology: Bluetooth and radio-frequency remotes can often control hidden devices. Infrared remotes usually need a clear line of sight or a compatible IR repeater.
1. How to Connect a Spectrum Receiver
Spectrum receiver models can vary, so follow the instructions supplied with your equipment. A typical installation uses the following connections:
Connect the coaxial cable from the active wall outlet to the receiver's Cable In port.
Connect the receiver's HDMI Out port to an available HDMI input on the television.
Attach the supplied power adapter and turn on the receiver.
Turn on the TV and select the HDMI input used for the Spectrum box.
Sign in to the My Spectrum App and follow the equipment setup and activation instructions. Browser-based activation may also be available through your Spectrum account.
Allow the receiver to download programming information and complete any required updates.
If the box does not activate, confirm that the coaxial outlet is active, the HDMI input is correct, and the receiver has finished starting up before repeating the process.
2. How to Connect a DIRECTV Receiver or Gemini Device
DIRECTV installation depends on whether you use traditional satellite equipment or an internet connected Gemini device.
Traditional DIRECTV Satellite Receiver
Keep the satellite coaxial connection attached to the appropriate receiver or Genie system port.
Connect the receiver's HDMI output to the television.
Attach power and turn on the receiver.
Select the corresponding HDMI input on the TV.
Follow the on-screen satellite and activation instructions supplied for your DIRECTV system.
Satellite systems may include a Genie, Genie Mini, power inserter, splitter, or other provider installed components. Avoid disconnecting those parts unless the installation instructions specifically require it.
DIRECTV Gemini or Gemini Air
Connect the Gemini device to the TV with HDMI. Gemini Air models connect directly to an HDMI input.
Connect Ethernet if you prefer a wired network and the model supports it; otherwise, select Wi-Fi during setup.
Connect the supplied power adapter.
Turn on the television and choose the correct HDMI input.
Follow the on-screen instructions to connect to the internet, pair the remote, and sign in or activate the device.
Because DIRECTV offers several equipment configurations, verify the exact model before hiding or permanently routing its cables.
3. How to Connect an Xfinity X1 or Xumo Stream Box
Xfinity customers may use an X1 TV Box, a wireless X1 box, or a Xumo Stream Box. Older installations may still include Flex equipment.
Xfinity X1 TV Box
Connect the coaxial cable to Cable In when required by the X1 model.
Connect the box's HDMI output to the television.
Attach the power cable and wait for the startup screen.
Select the matching HDMI input on the TV.
Follow the on screen activation prompts and sign in with your Xfinity account when requested.
Xumo Stream Box from Xfinity
Make sure the Xfinity internet service is active.
Connect the Xumo Stream Box to the television with HDMI.
Connect the supplied power adapter.
Turn on the TV and select the correct HDMI input.
Choose the language, connect to the Xfinity network, pair the remote, and complete the on-screen activation process.
Wireless X1 and Xumo equipment should have a strong connection to the home's Xfinity network. A weak signal can cause buffering, slow menus, or reduced picture quality.
4. How to Connect an Amazon Fire TV Stick
Amazon Fire TV Sticks are compact and easy to hide, making them a popular choice for wall-mounted televisions.
Insert the Fire TV Stick into an available HDMI input. Use the included HDMI extender when direct access is tight or the device interferes with another port.
Connect the supplied USB power cable and compatible power adapter. Avoid relying on an underpowered TV USB port if the Fire TV displays a power warning or behaves inconsistently.
Turn on the television and select the appropriate HDMI input.
If the remote does not pair automatically, hold the Home button for approximately 10 seconds and follow the on-screen instructions.
Connect to Wi-Fi, sign in with the Amazon account, install updates, and download the desired apps.
Do not wedge a Fire TV Stick tightly between the television and wall. Leave enough space for the HDMI connector, power cable, ventilation, and Wi-Fi reception.
5. How to Connect an Apple TV 4K
Apple TV is a small set top box that requires HDMI, power, and an internet connection.
Connect the Apple TV to an available HDMI input on the television.
Connect the Apple TV power cord to a suitable outlet.
If the model has Ethernet and you prefer a wired connection, connect it to the router or network switch. Otherwise, use Wi-Fi during setup.
Turn on the TV and select the Apple TV's HDMI input.
Follow the on screen instructions to choose a language, connect to the network, and sign in with an Apple Account. A nearby iPhone or iPad can simplify the process on supported devices.
Check the video and audio settings after setup to confirm the preferred 4K, HDR, and sound formats.
Use a cable that supports the system's required video features. For a modern 4K HDR installation, an Ultra High Speed HDMI cable provides additional bandwidth and compatibility for advanced formats.
6. How to Connect a Roku Player or Streaming Stick
Roku setup varies slightly between Streaming Stick, Express, and Ultra models.
Connect the Roku device to an HDMI input. Streaming Sticks plug directly into HDMI, while Roku boxes connect with an HDMI cable.
Connect the supplied power cable. For models that support USB power, a wall adapter may provide more consistent power than some television USB ports.
Turn on the TV and select the correct HDMI input.
Pair the Roku remote if prompted.
Choose Wi-Fi or Ethernet when supported, enter the network information, and allow the software update to finish.
Follow the email link or QR-code instructions to sign in or create a Roku account and link the player.
A Roku account is free. Complete activation only through the official Roku process shown by the device.
Need help installing and hiding your streaming devices?
7. How to Connect a Soundbar
The best connection depends on the ports and features supported by both the TV and soundbar.
HDMI eARC or ARC
Connect the television's HDMI eARC/ARC port to the soundbar's corresponding HDMI eARC/ARC port.
Select HDMI eARC, ARC, or External Audio System in the TV's sound settings.
Enable HDMI CEC if required for power and volume control.
Select the appropriate soundbar input and test audio from each connected source.
HDMI eARC provides more audio bandwidth than standard ARC and can support advanced high-bitrate formats when the television, soundbar, source, content, settings, and cables are all compatible.
Optical Digital Audio
Connect the TV's optical output to the soundbar's optical input.
Set the television audio output to Optical or External Speakers.
Select Optical on the soundbar.
Optical is a reliable alternative when eARC or ARC is unavailable, but it does not support every advanced audio format.
Bluetooth
Place the soundbar in Bluetooth pairing mode.
Open the television's Bluetooth audio settings.
Select the soundbar and test playback.
Bluetooth avoids an audio cable but may introduce delay, reduced format support, or connection interruptions on some systems.
Hiding Streaming Devices and Cables
A clean wall-mounted TV installation should keep equipment accessible, ventilated, and safe—not simply force everything behind the screen.
Recessed media boxes: Useful for compatible streaming sticks, small media players, outlets, and organized low voltage cabling. Confirm the box dimensions, ventilation, and device requirements first.
Device mounting brackets: Apple TV, Roku, Fire TV, and similar devices can often be secured behind the television with a purpose built holder.
Ventilated media consoles: Larger cable boxes, satellite receivers, gaming consoles, and AV equipment usually perform better in an accessible cabinet with airflow.
IR repeaters: These can provide remote control access when an infrared receiver must be hidden.
In wall cable management: Use listed in wall rated low voltage cables and an appropriate permanent power solution. Do not route ordinary extension cords or non rated power cables inside the wall.
Surface raceways: Paintable cable channels are a practical option when in-wall routing is not possible.
Avoid placing devices where they block television vents, trap heat, strain HDMI connectors, or interfere with the movement of a full-motion mount.
Troubleshooting Common Connection Problems
The TV Shows “No Signal”
Confirm that the TV is set to the exact HDMI input used by the device.
Make sure the source device is powered on and fully started.
Reseat both ends of the HDMI cable.
Test another HDMI input or a known-working cable.
Temporarily connect the device directly to the TV if it normally passes through a soundbar, receiver, splitter, or switch.
There Is Picture but No Sound
Check the TV's audio output setting.
Confirm the soundbar is using the correct eARC, ARC, optical, or Bluetooth input.
Make sure the HDMI cable is connected to the ports specifically labeled eARC or ARC.
Restart the television, soundbar, and source device.
The Remote Does Not Work
Replace or recharge the batteries.
Move closer to the device during pairing.
Confirm that a hidden infrared device has line of sight or a working IR repeater.
Repeat the manufacturer's pairing process for Bluetooth or voice remotes.
Streaming Buffers or Wi Fi Disconnects
Check signal strength behind the television.
Move the router or mesh node closer when practical.
Use Ethernet on compatible devices for a more consistent connection.
Avoid placing the streaming device directly behind dense metal mounting hardware when another position is available.
Activation Will Not Finish
Confirm that the internet or coaxial service is active.
Verify the account credentials and equipment serial number when requested.
Allow software updates to complete.
Restart the device by disconnecting power for approximately 30 seconds, then reconnect it and follow the official activation prompts again.
How LECSER Can Help
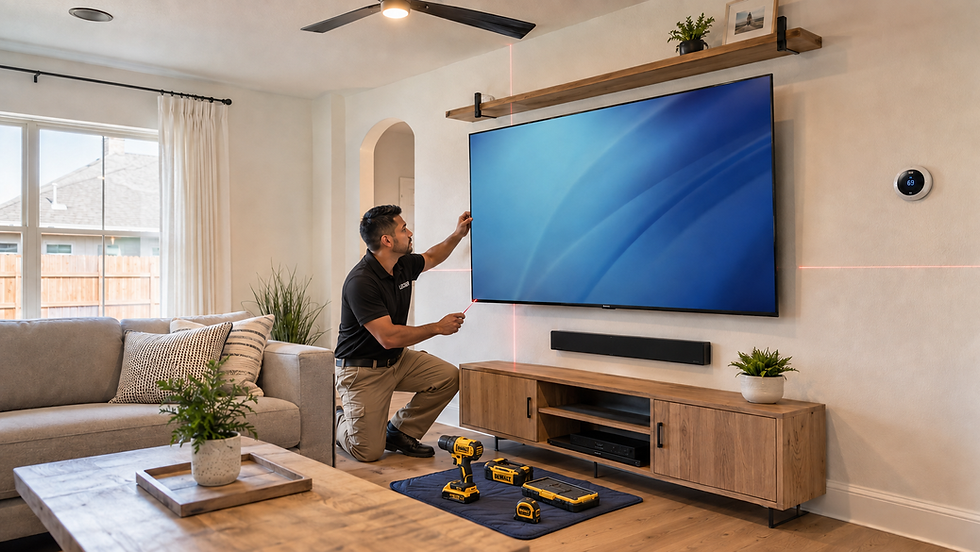
LECSER can mount the television, connect compatible entertainment devices, organize HDMI and power connections, install soundbars, plan recessed media storage, and conceal visible wiring.
The objective is a system that looks clean, remains easy to service, and works correctly from the TV remote, streaming remote, or provider remote.
Frequently Asked Questions
What devices can LECSER connect after mounting a TV?
LECSER can help connect compatible Apple TV, Amazon Fire TV, Roku, Spectrum, DIRECTV, and Xfinity equipment, as well as soundbars, gaming consoles, Blu-ray players, and AV receivers.
Can a cable box be hidden behind a wall-mounted TV?
Sometimes. The decision depends on the box dimensions, ventilation requirements, remote technology, wall clearance, wiring, and the television mount. Larger receivers are usually better placed in a ventilated and accessible media console.
How can a Fire TV Stick be installed behind a wall-mounted TV?
Connect it to HDMI using the included extender if necessary, supply reliable power, and position it where it does not block ventilation or become crushed between the TV and wall. Then select the corresponding HDMI input and complete Wi-Fi and account setup.
Why does the television say “No Signal”?
Common causes include selecting the wrong HDMI input, a loose or defective cable, an unpowered source device, an incomplete startup or update, or an incompatible connection through a switch, receiver, or soundbar.
Can LECSER hide the wires for streaming devices and cable boxes?
Yes. Depending on the wall and equipment, LECSER can provide in-wall cable concealment, recessed media-box installation, device mounting, cable organization, or surface raceway solutions.
Can several devices be connected to one wall-mounted TV?
Yes, if the television has enough compatible inputs. When additional ports are needed, an appropriate AV receiver or HDMI switch may be considered after checking its 4K, HDR, refresh-rate, HDCP, and audio compatibility.
Ready for a Clean, Connected Entertainment Setup?
Avoid tangled cables, incorrect inputs, weak connections, and devices left hanging behind the screen. LECSER can help organize your wall-mounted television and connected equipment for a cleaner, more reliable setup.


Comments